Deploy your laravel applications like pro using Bitbucket
In this journey I'll be your guide into how to deploy your laravel application to multiple servers using CI and pipelines that will make your life so much easier and allow you to achieve zero-downtime deployments.
This is a detailed technical how-to guide, though I'll use simple words to describe most of the complicated technical terms. It also designed to be copy-paste friendly as you go!

# Trip Map
# Getting Ready
In this section we'll:
# Make sure to have ssh access
First Things first, you'll need ssh access to the server/droplet, cd into your home dir or to the path where do you want the files to be deployed typically in /home/example.com/public_html/ then create new folder "production".
cd /home/example.com/public_html
mkdir production
# Setup new bitbucket repo
This is an optional step if your project already on bitbucket skip a head to the next step.
Create master branch or production branch whatever suites you best. Anything will be pushed into that branch will trigger a deployment pipeline that will use the environments variables bellow.
# Configure repository and deployment variables
Navigate to Repository settings then to Repository variables
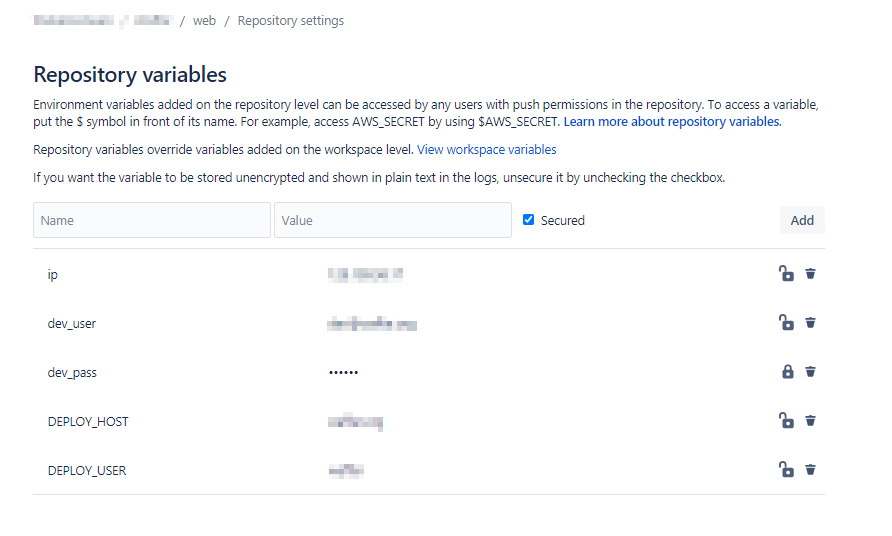
Here you'll find your secret keys/configurations. You dont want your paths and secret keys laying around anywhere public. Configure DEPLOY_HOST and DEPLOY_USER, theses two variables will hold the server/droplet ip address and "deployment user" i.e. "example" on the server.
Do not configure DEPLOY_USER as root. It's not recommended, use user with limited permissions just for the deployment process and only have access to site folder.
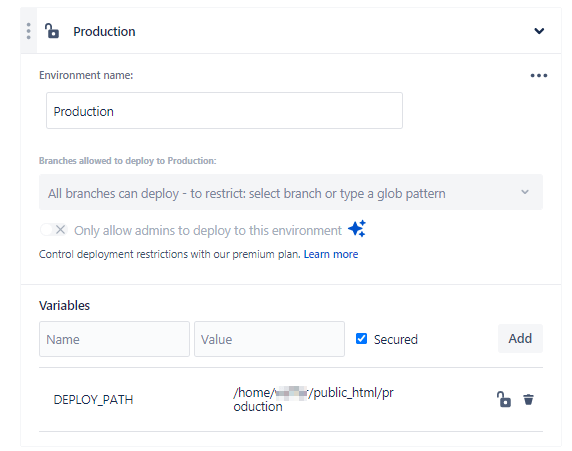
Next configure deployment environments (staging and/or production) in Deployments tap,
configure DEPLOY_PATH with the path up to the production folder.
Next, you need to let bitbucket have restrected access to the server. Navigate to SSH Keys tap, generate new key if you haven't, copy public key into .ssh/authorized_keys file in your deployment user base directory on the server for example if your user called "example" the .ssh folder will most likely be in /home/example/.ssh.
I spent hours debug this one so hear me out, dont copy the public key into the server's base .ssh key because then bitbucket will not have permission to access the deployment user!
If for some reason .ssh doesn't exist it's easy to generate one!
ssh-keygen -t rsa
You'll be prompt Enter file in which to save the key (/home/example/.ssh/id_rsa): just make sure to set the correct path.
- Optionally you can check if the pipeline can access your server by clicking on
Fetchbutton that will put your server ip into bitbucket's pipeline's known hosts. This will help preventing any interruption in the pipeline terminal during the first run.
# Create bitbucket-pipeline.yaml file
Next head up to your project base directory and create bitbucket-pipeline.yaml file. For now just copy paste (opens new window), stick around if you want to know all about this file 😃
The file you just copied contains 2 environments staging and production feel free to mess around with it after reading this section!
# Create Envoy.blade.php file
Next create Envoy.blade.php file in your project base directory. Again for now just copy paste (opens new window) you dont have to configure anything for now it will out of the box for now. Skip to the file contents here.
# Avoid Caffeine overdose
I spend many hours with this strange error where apache server wasn't able to read storage folder and only display cached version of the app because it wasn't following the symbolic link production/current.
25 Cup of coffer later, I found that I forgot to setup this line in .htaccess in my base public_html directory.
Options +FollowSymLinks
This line will make apache load the symbolic link directly.
# How these all things tie together?
Let's take a step back and take a look on how this whole thing works. But first let's understand in any server/environment these commands will be executed.
# Deployment steps overview
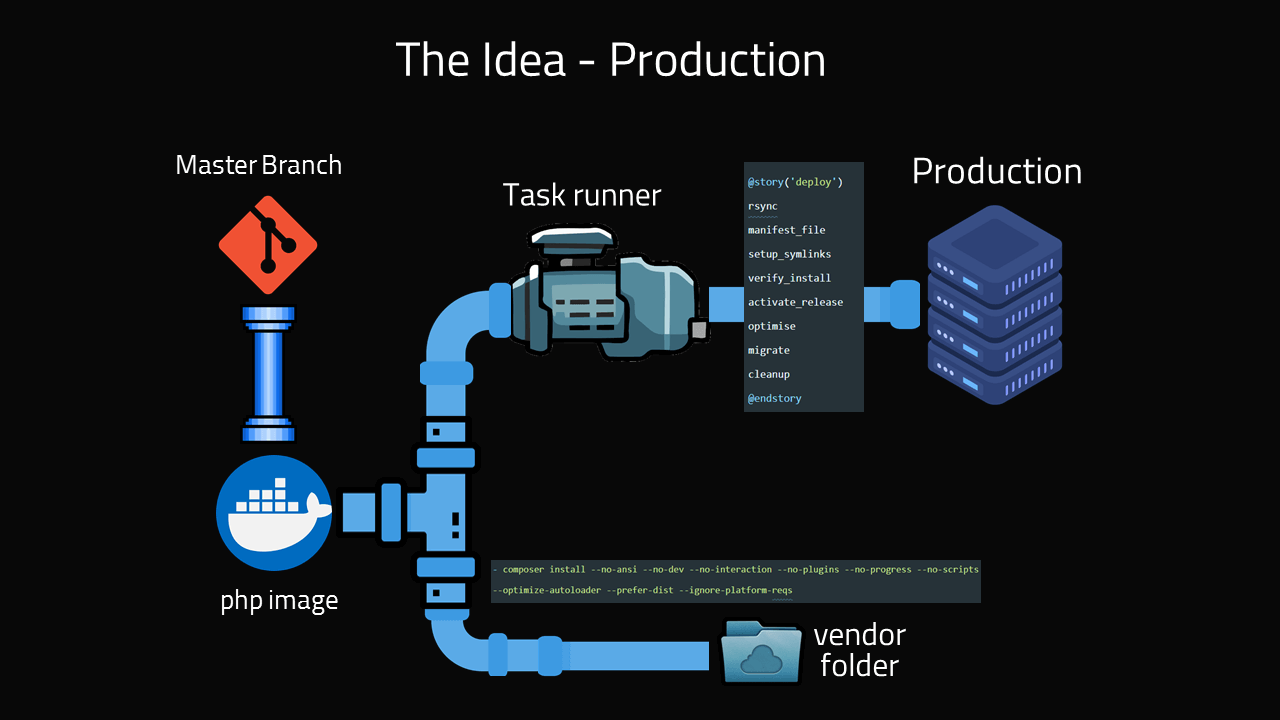
1- When you push new code to master branch or your main branch. Pipeline will pickup on it and trigger deployment processes defined in bitbucket-pipeline.yaml.
2- Bitbucket pipeline will create docker container to build php/composer vendor and/or node_module folders.
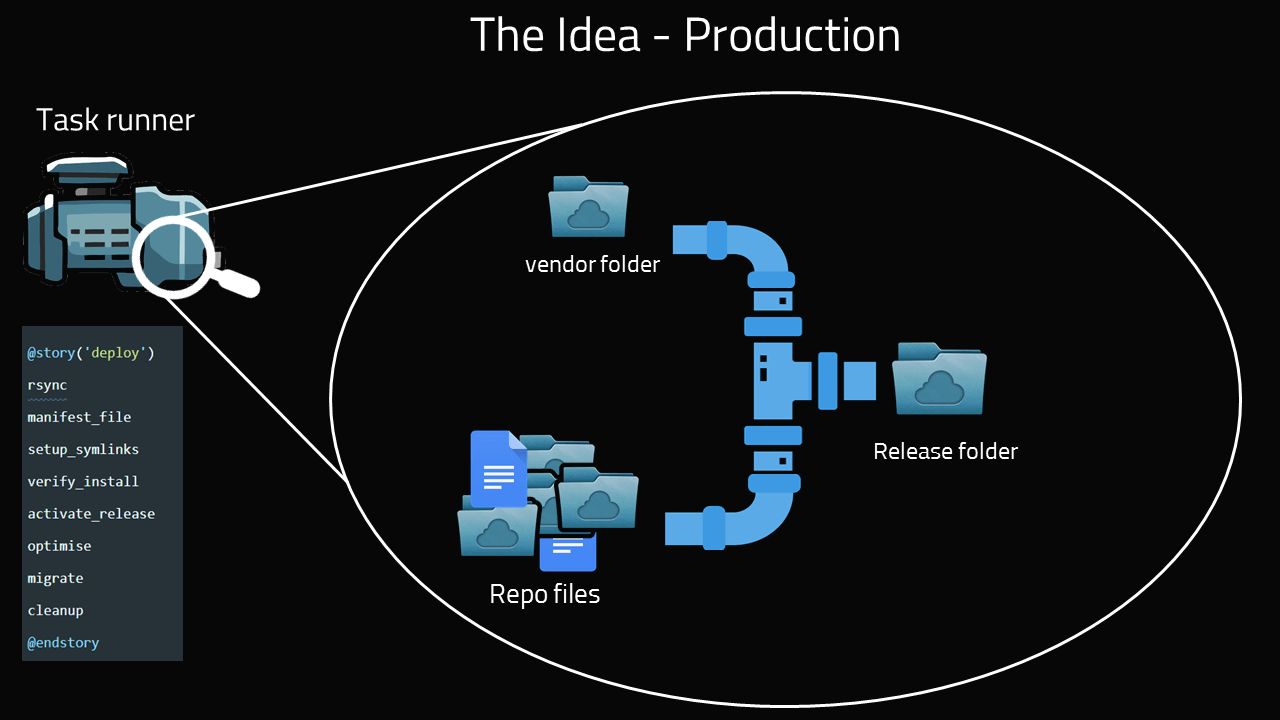
3- Next, will run a task runner called Envoy (opens new window) that will run tasks defined in Envoy.blade.php on both pipeline and your server.
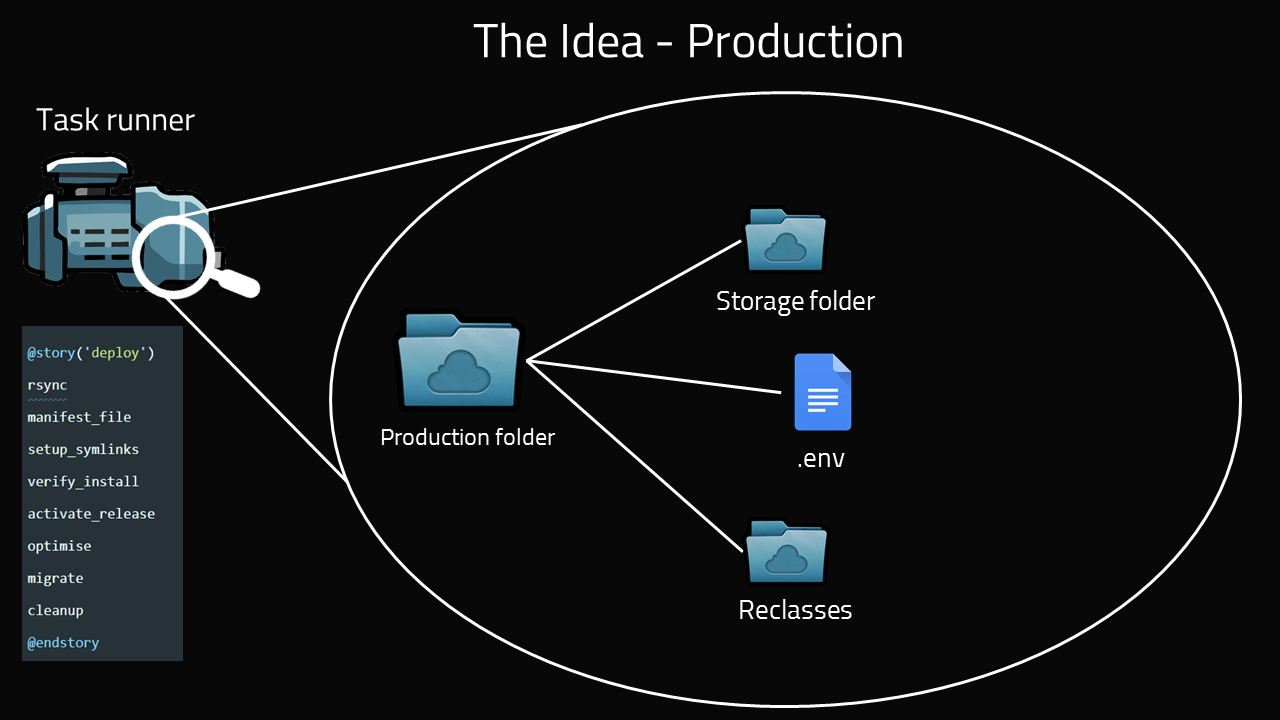
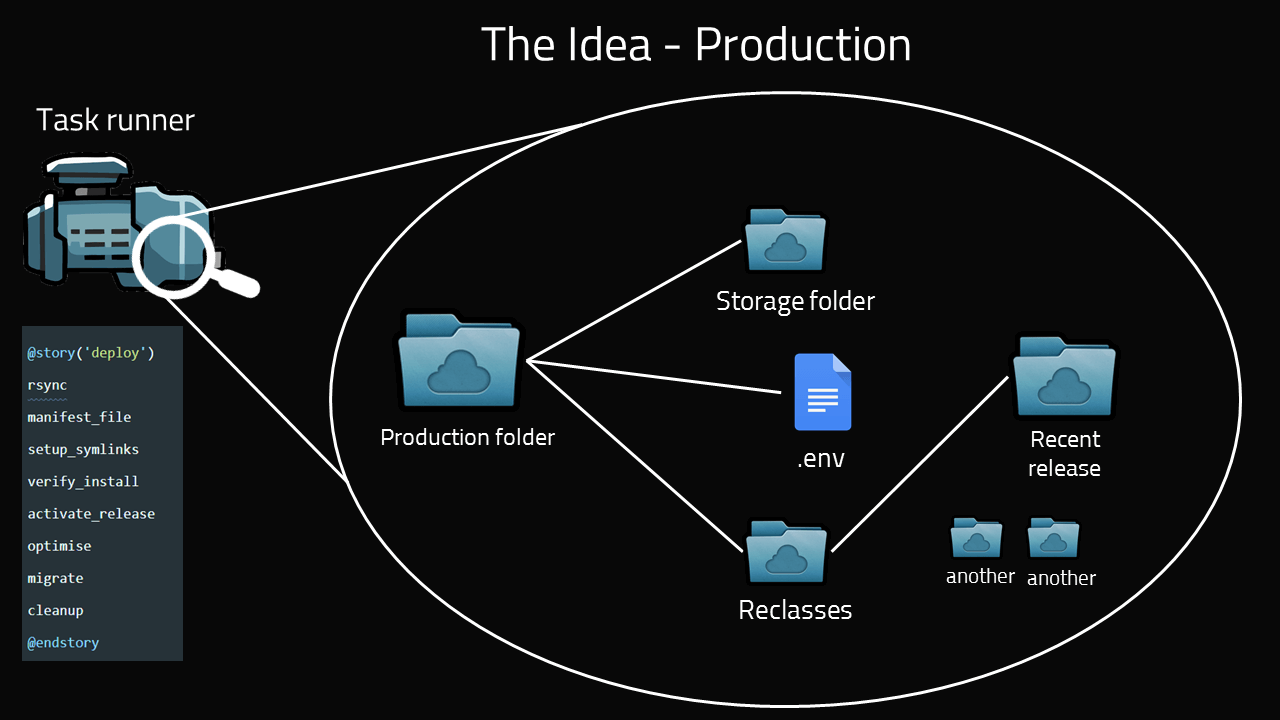
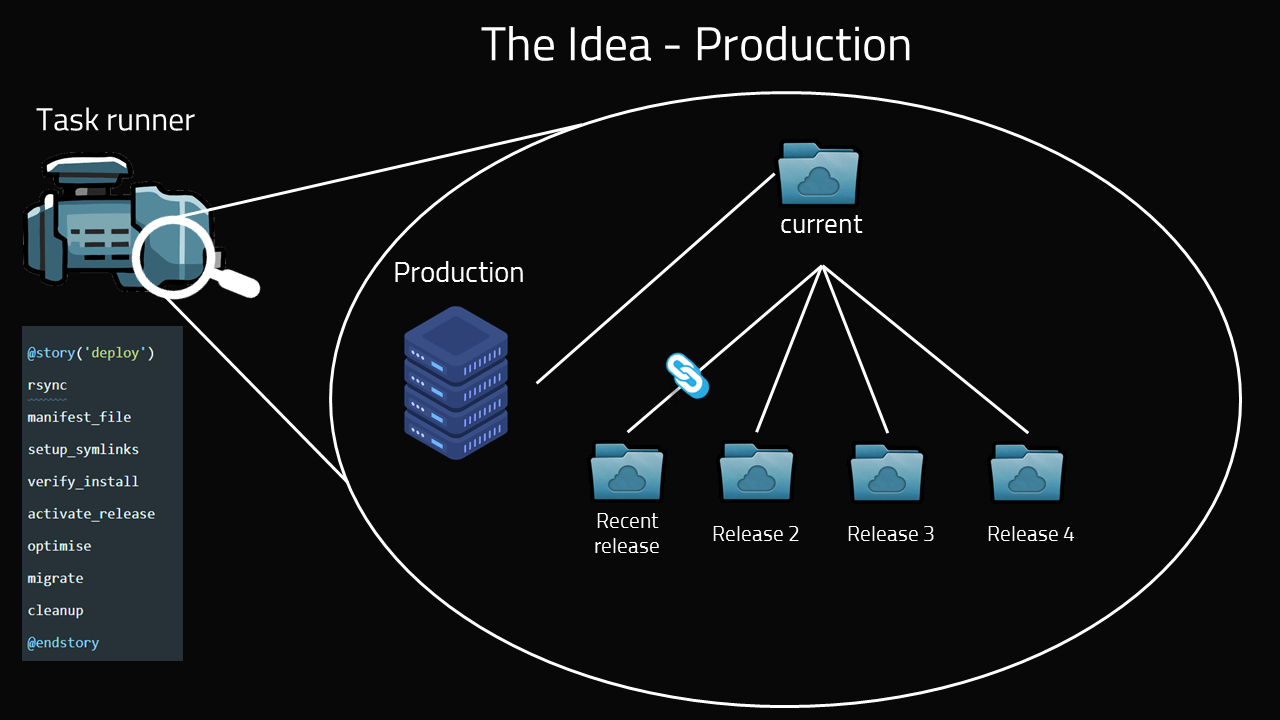
# Production directory structure
Let's take a look at production folder structure.
releasesfolder contains timestamped releases of every push to master..envyour typical .env file contains your environment variables that will be shared across all releases.storagealso your typical storage folder that will be shared across all releases, you dont want to duplicate Gigabytes worth of data across multiple releases.
# Severs defined in Envoy.blade.php
Envoy.blade.php has 2 definition of "servers":
webserver which represents your server/drop.localhostwhich represents pipeline's docker container.
# Let's jump inside Envoy's scripts
# Rsync
- First task called "rsync" will be executed on
localhost. Resync (transfer) project files + any artifacts folders/files that resulted from executing any commands on the docker container to your server inDEPLOY_PATHdir.
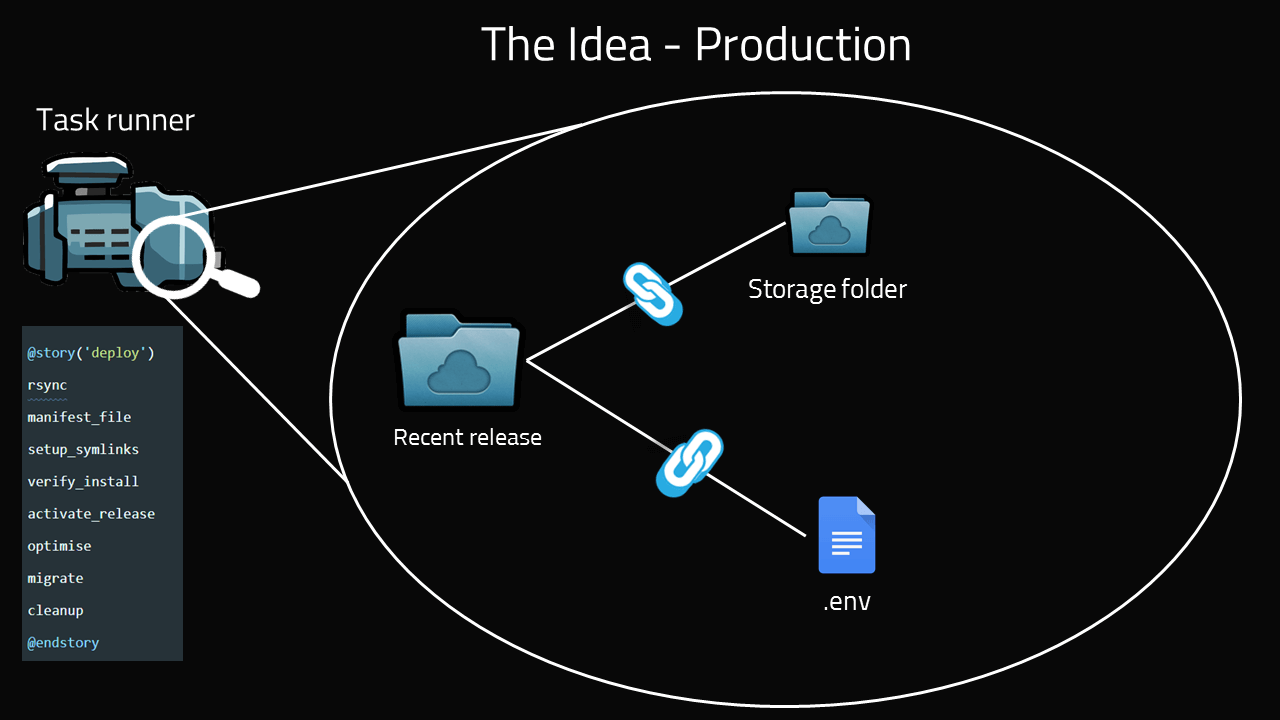
# Setup Symlinks
- Link
.envfound inproductionfolder to the new release folder. - Check if the new release folder has
storagefolder, then move it to backup format since we'll symlinkstoragefolder found inproductionfolder. - Link
storagefolder, and symlinkpublic/storagefolder as well.
# Verify Install
"verify_install", here you can do whatever you want to verify that the release is working properly.
I chose a simple approach and ran artisan --version.
# Activate Releases
"activate_release", Symlink current folder to the new release folder.
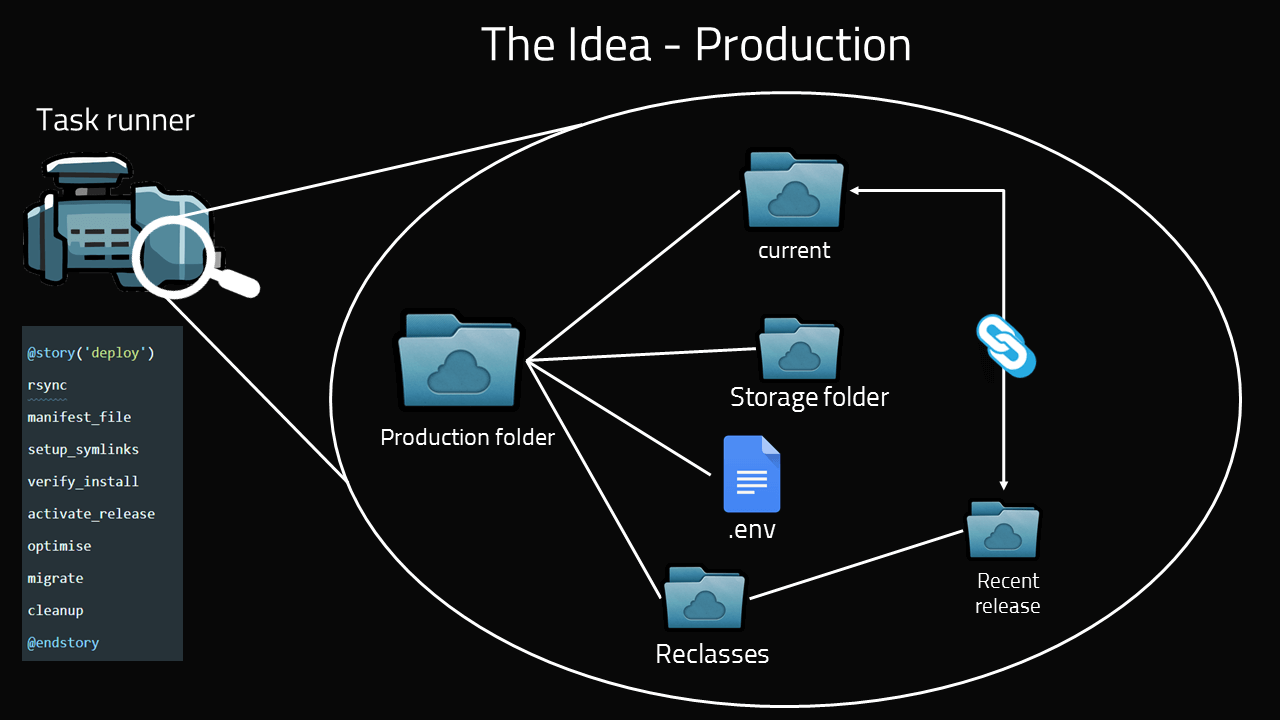
You have to configure your server (Nginx/Apache) to point your domain to current/public symlink. Typically found in path-to-production-dir/production/current/public
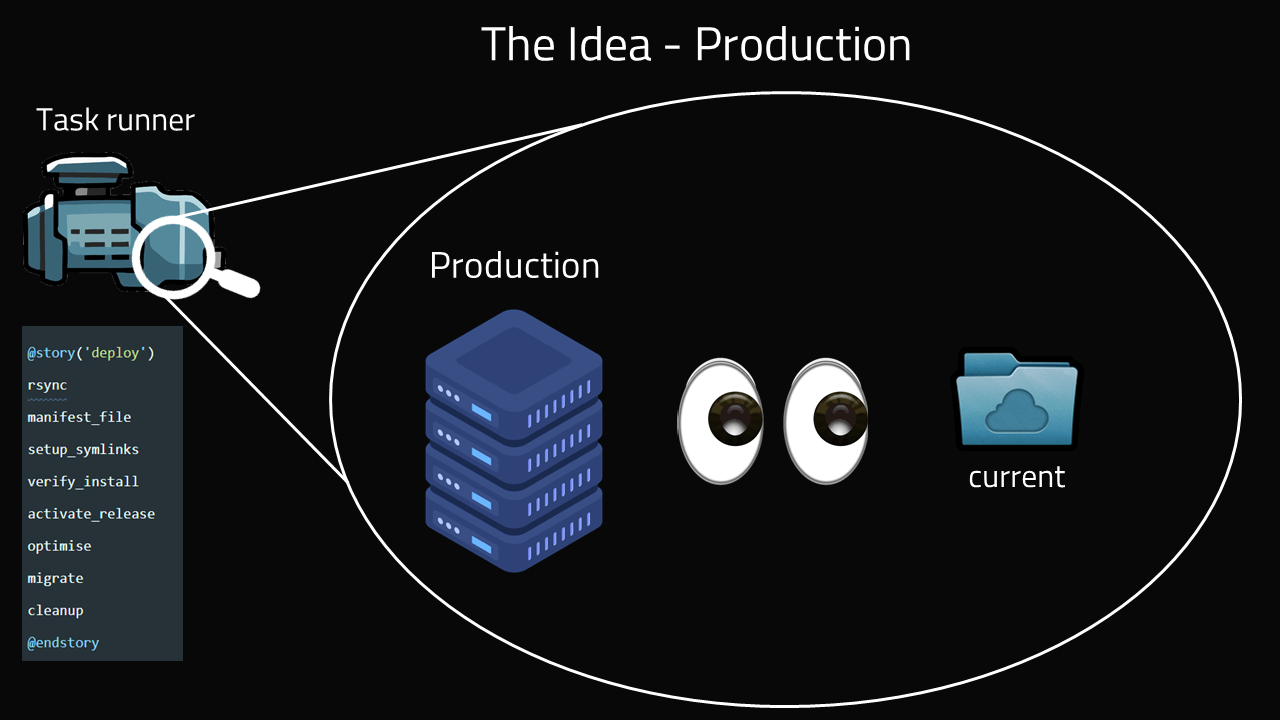
# Migration
"migrate", Do any database related things in this task, note that I'm using --force flag in the migration command because we'll be in production environment.
# Optimizations
"optimise", Any optimization tasks like clearing caches and recompile views.
Pro tip: use php artisan optimize:clear to clear all caches and compiled views then php artisan optimize.
# Additional tasks
"additional_tasks", Do any additional tasks like publishing views/translations.
# Symlink powers
With any luck, every push to "master" i.e. production branch will be uploaded as separate new release. The magic here relays in current symlink that will point to the most recent working release. This happens instantly so you'll achieve zero-down time upgrade and in the same time allows to rollback to previous releases whenever needed. How cool is that!
# bitbucket-pipeline.yaml
This file contains defined steps that will specify docker image, php versions, branches, scripts and much more.
Let's go deep in it line by line:
image: php:7.4-fpm
It was important for me that production pipeline runs very fast, no more than 2 mins, so here I'm using optimize docker image containting just enough to run php 7.4 environment, of course you can miss around with different images but I found this the fastest amount them.
  steps:
    - step: &composer-install
        name: Build PHP
        caches:
          - composer
        script:
          - ls -al
          - apt-get update && apt-get install -qy unzip git curl libmcrypt-dev
          - curl -sS https://getcomposer.org/installer | php -- --install-dir=/usr/local/bin --filename=composer
          - composer --version
          - composer install --no-ansi --no-dev --no-interaction --no-plugins --no-progress --no-scripts --optimize-autoloader --prefer-dist --ignore-platform-reqs
        artifacts:
          - vendor/**
definitions key will define any steps or variables that we'll use through out the pipeline execution run.
First I defined compser install step which will
- Pull fresh composer install
- Output composer version
- Install optimized no dev dependencies
- Caches vendor folder for extra juicy speed.
It's important to run optimized composer install because this is a production env vendor folder will be much smaller.
    - step: &deploy-production
        name: Deploy (Production)
        deployment: Production
        caches:
          - composer
        script:
          - apt-get update && apt-get install -qy unzip git curl libmcrypt-dev rsync
          - curl -sS https://getcomposer.org/installer | php -- --install-dir=/usr/local/bin --filename=composer
          - composer --version
          - composer global require "laravel/envoy"
          - ~/.composer/vendor/bin/envoy run deploy --host=$DEPLOY_HOST --user=$DEPLOY_USER --path=$DEPLOY_PATH --build=$BITBUCKET_BUILD_NUMBER --commit=$BITBUCKET_COMMIT --branch=$BITBUCKET_BRANCH --php=php --dir=$BITBUCKET_CLONE_DIR
Here pipeline will install "rsync" and the task runner "Laravel Envoy (opens new window)" and run it.
pipelines:
  default:
    - step: *composer-install
    # - step: *npm-build
  branches:
    master:
      - step: *composer-install
      # - step: *npm-build
      - step: *deploy-production
In pipelines key you'll define the defult behavior for each branch.
# Closing thoughts
You don't have to use bitbucket in any pipeline implementation like Travis CI or GitHub actions will do just fine as long as the pipeline will have an ssh access to the server to run Envoy (opens new window) and excute the tasks.
Comment bellow if you have any question or say Hi on twitter @nagiworks (opens new window), I would be more than happy to help.